Releases
How can this feature help teams in release management?
The main goal of this form is to become your right-hand man in any release cycle, no matter how complex one.
- The digestible table format brings together the critical information and helps you visualize data such as target release dates, statuses and risk levels.
- As the view of the table may be adjusted to individual requirements and later on saved, the users can prioritize more effectively.
- Thanks to storing information in one space, each team-member is on the same page, improving team-coordination.
- Overall the knowledge base allows the teams to plan better, avoid previous hardships and reach the end-goal: delivering features faster.
Where can you find your right-hand man?
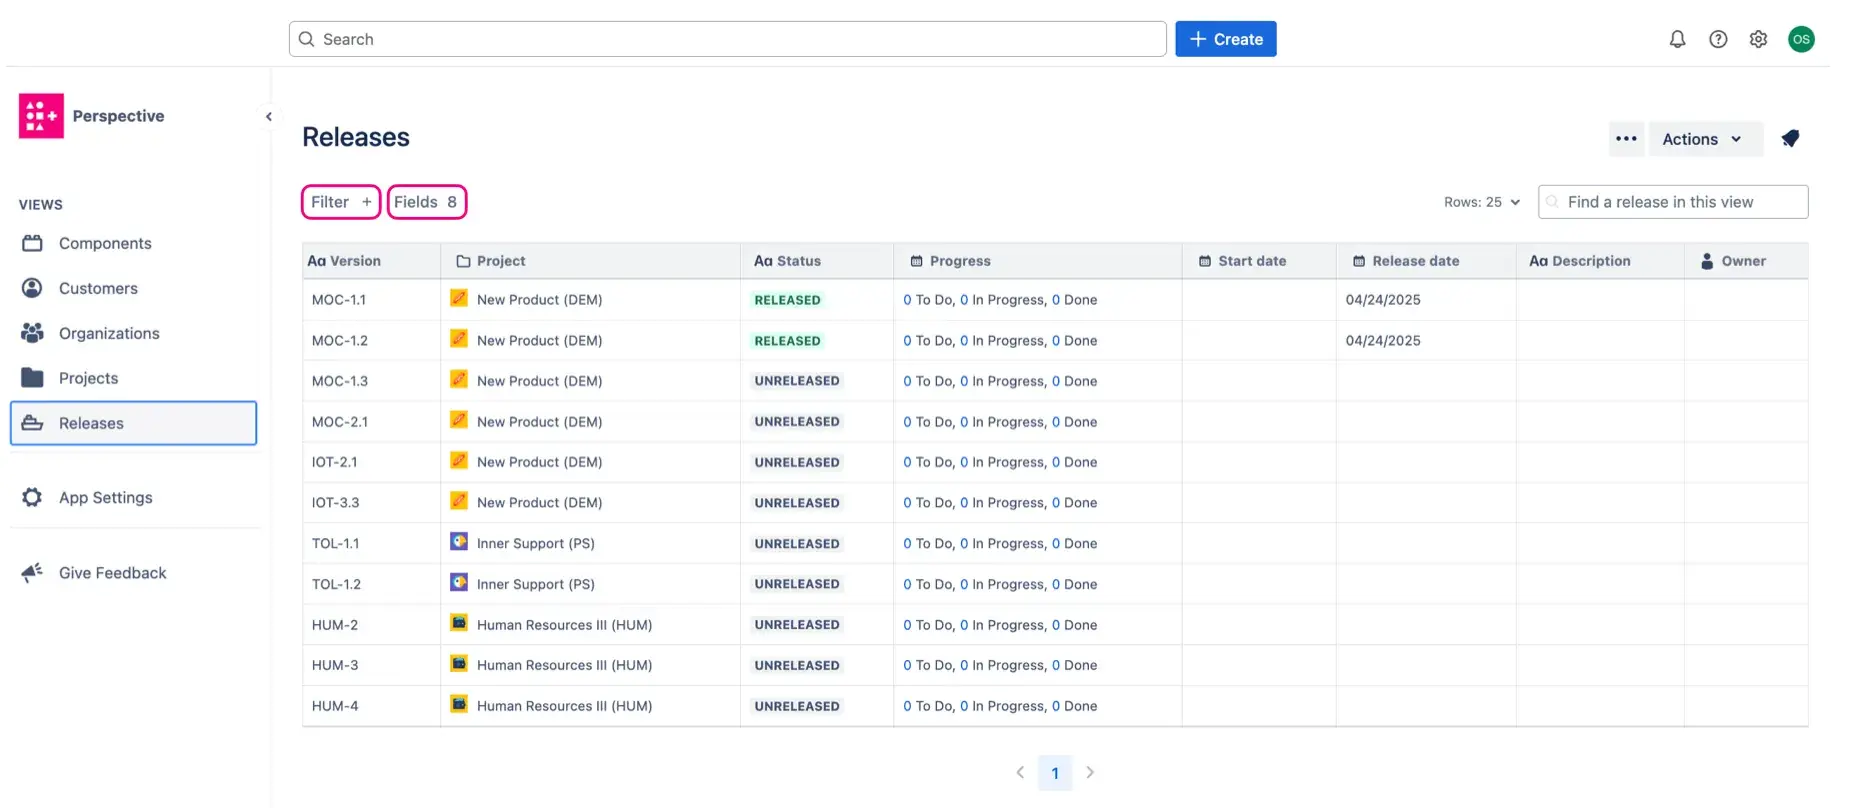
In order to access the form, go to Apps and select Perspective. In the View section on the left-side, you can go into chosen object. All of the data is showed in a table format which includes the fields you have selected during the form design.


Information about the fields in the form:
- Fields derived from Jira:
- Version (with link to the release view under specific project)
- Project (name with issue key and an avatar)
- Status
- Released
- Unreleased
- Archived
- Progress
- Showing the number of issues under each status: To do, In progress and Done
- Start date
- Release date
- Description
- Fields provided by the add-on:
- Owner
- Release phase
- The search bar works based on Release Name
How to make the most out of the Release view?
- Switch the order of fields in the table and move the most important aspects to the front: just drag and drop each column.
- Add information and edit it right in the table - you can do it by clicking the expandable arrows. They are visible once you move the cursors on the project name.
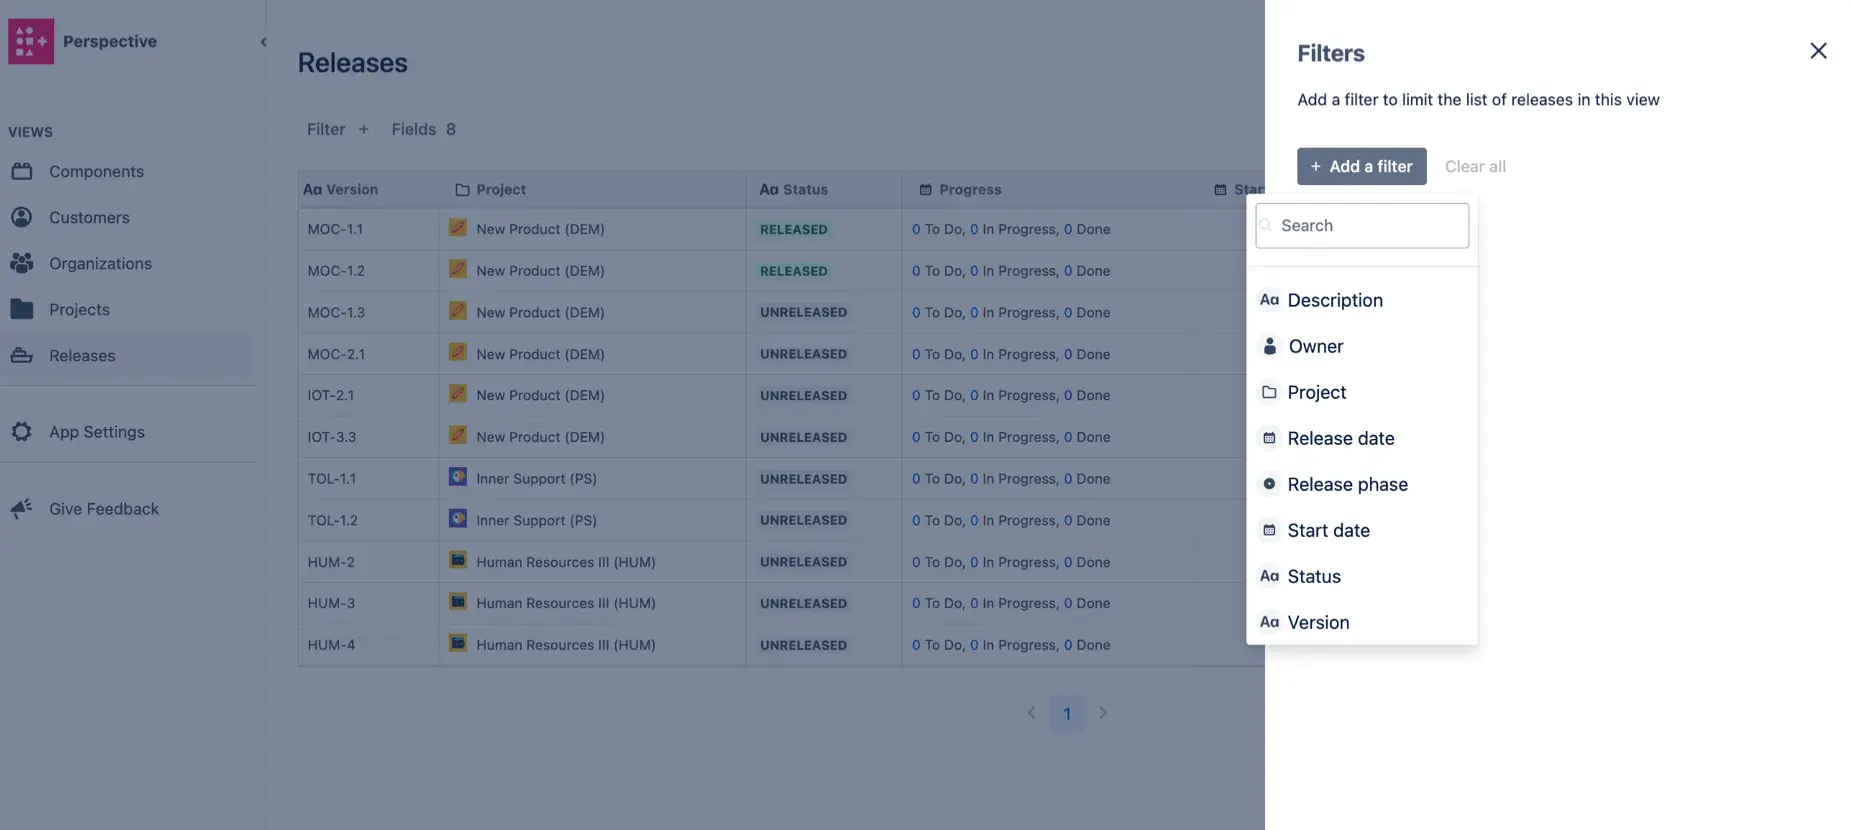
- Filter the table by, e.g. Project Owners, remove distractions and quickly gain focus. Remember to save the view for an easy access.
- The Filter button on top of the table allows you to select your own view of the information in the table. You can add multiple filters.


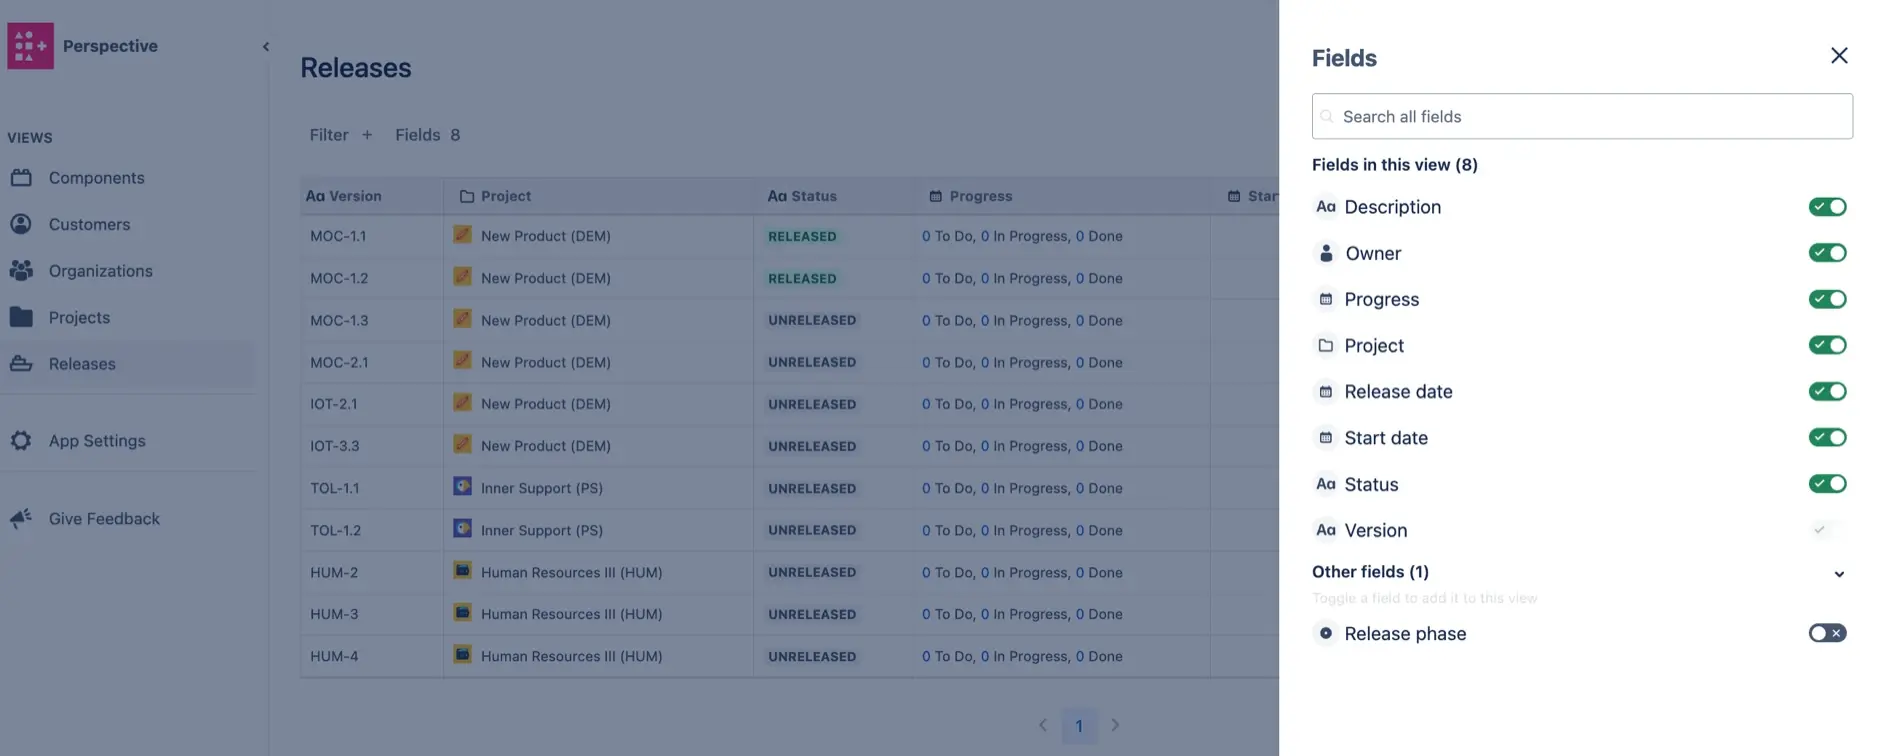
- Less is more, so if you don’t need to view some of the data gathered, adjust the fields that are visible, without losing the information.
- Click on the Fields button turn on/ off the toggle to make attributes visible/invisible.
- Some of the fields are required and cannot be disabled. Here, that applies to the ‘Name’ field.


Many perspectives and just one table? Save your views!
Each adjustment of the form can be saved with the button on the top of the page. In the new window, you can name the view and select to whom it should be available. This way you are making the most of your extensive database without losing time on distracting details.