Multilevel Select
Info
For all of the following procedures, you must be logged in as a user with the Jira Administrators global permission.
How to create a new multilevel select custom field with options?
Steps
- Go to Issues > Custom fields.
- Create a new custom field of type Multilevel Select. You will find it in the advanced section.
- Click “Contexts and the default value” next to the custom field that has already been created.
- Click Edit custom field config.
- Create as many options as you need. Each parent option represents a separate selection.
- To create a dependent select, click Options to open and configure a new level.
- Click Save to save changes.
Info
- You can create select deep up to 7 levels.
- Each option within a level must have a unique name.
- The option name is not limited to the number of characters.
- Remember to add this custom field to the screen on which you want to use it.
How to add a Multilevel Select custom field to the project?
Company-managed project
To add a custom field in a company-managed project, you can do it from the custom field level with Screens and context and then add or remove the associated screen.
You can get the same result by adding a custom field to the list in Screens options on the left menu in Issue global settings.
⚠️ To add a custom field to the company-managed project, you must be a global admin.
Team-managed project
In a team-managed project, go to the project settings -> issue types -> Search for field -> and add a custom field where needed.
⚠️ You can do it as project admin.
Info
Multilevel Select custom field works for every kind of project: business, software, service, company- and team-managed.
How to set the field as required?
If you would like to set this custom field as required on the create issue screen, check this option when setting up options.
- Go to Issues > Custom fields.
- Find the custom field you want to set as required or create a new one.
- Click “Contexts and the default value”.
- Click Edit custom field config.
- In the left corner, there is the Settings drop-down. Choose the Set fields required.
- If you mark the checkbox, the user must fill in all selects visible on the dialog.

How to add options in bulk?
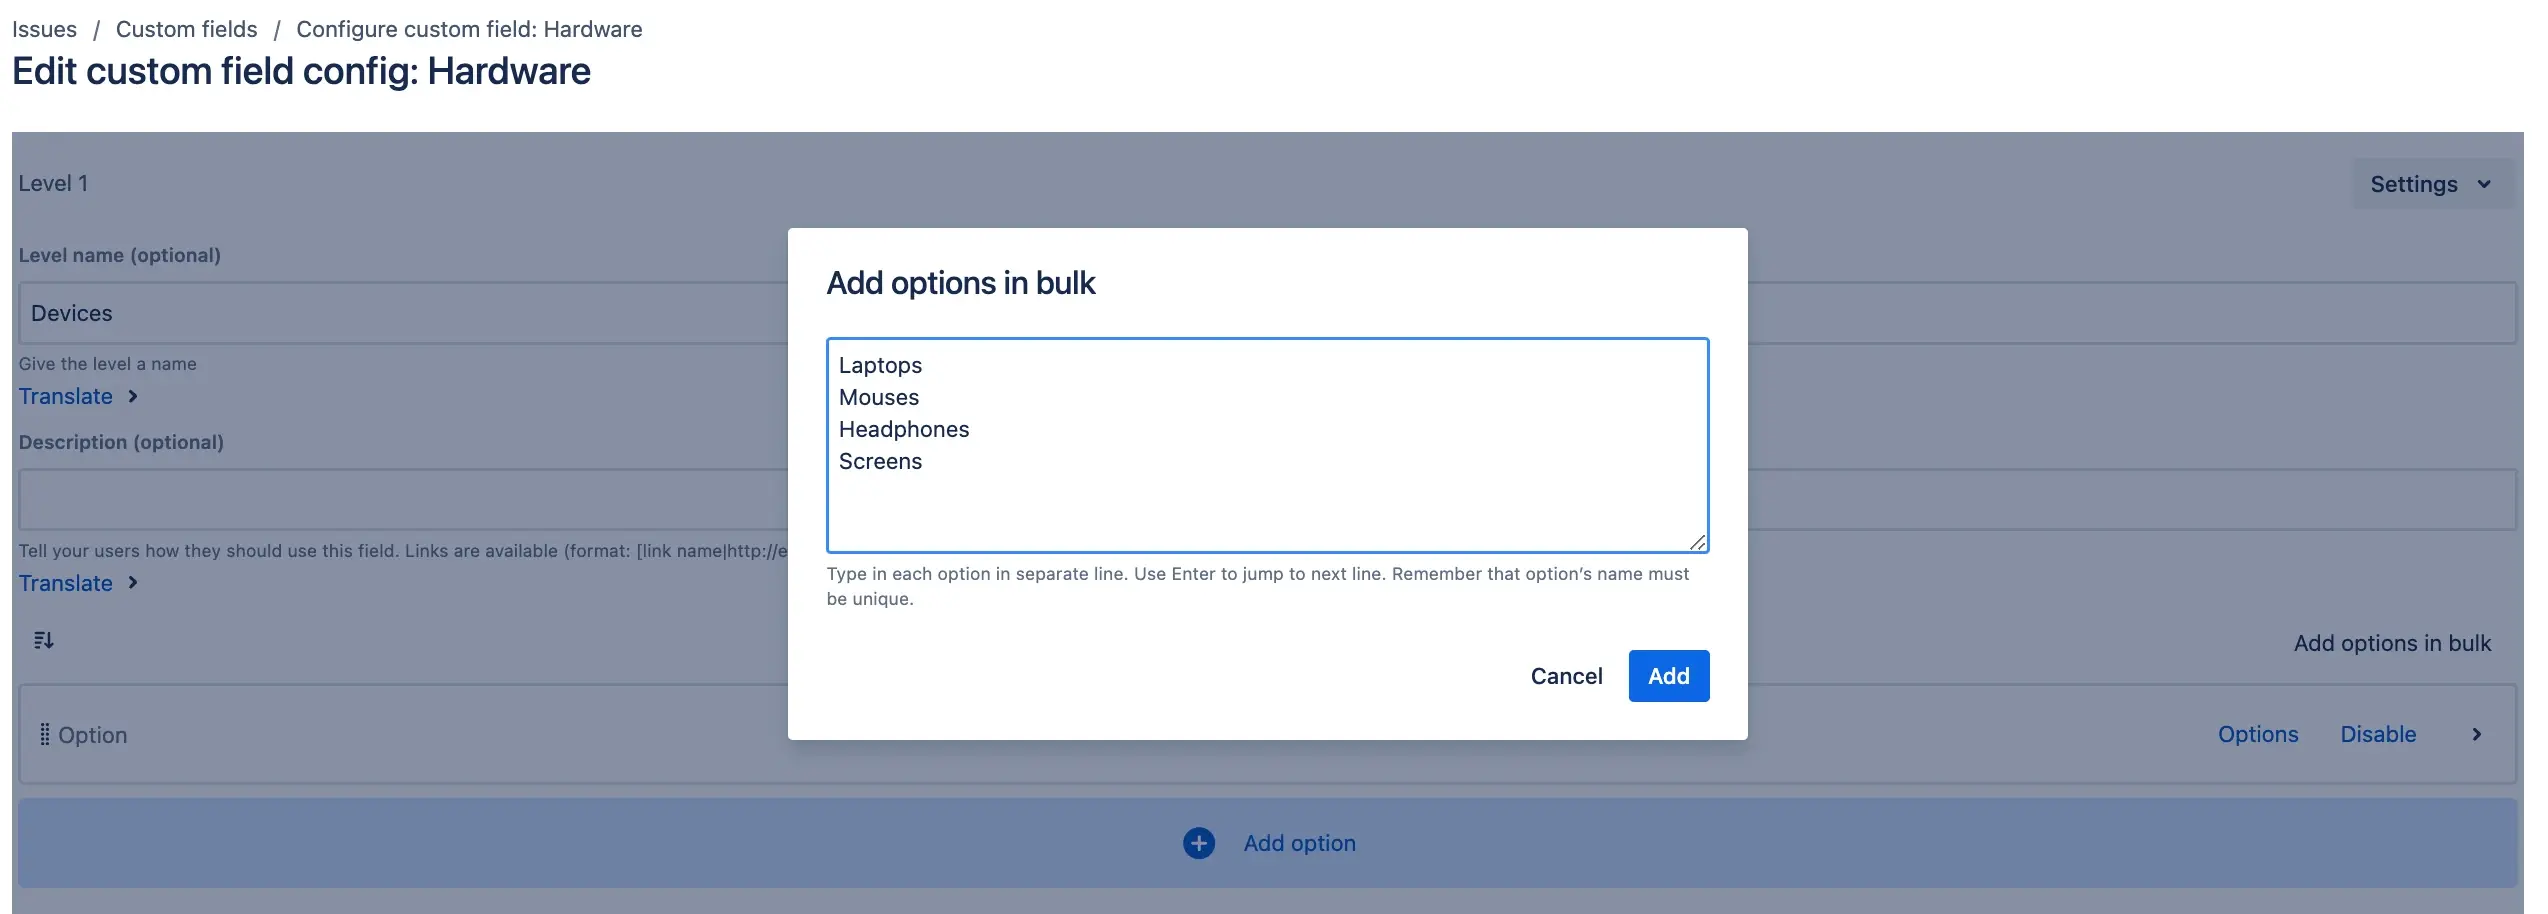
⏰ To save time, you can add several options to a level at once.
Steps
- Click Add options in bulk on the level to which you want to add options. Notice that this option adds options to the list; it is not a replacement (it does not remove existing ones).
- On the dialog, type in each option in a separate line. Use Enter to jump to the next line. Remember that the option’s name must be unique.
- Click Add to add options to the list.
- Click Save to save changes in the custom field.

How to reorder options?
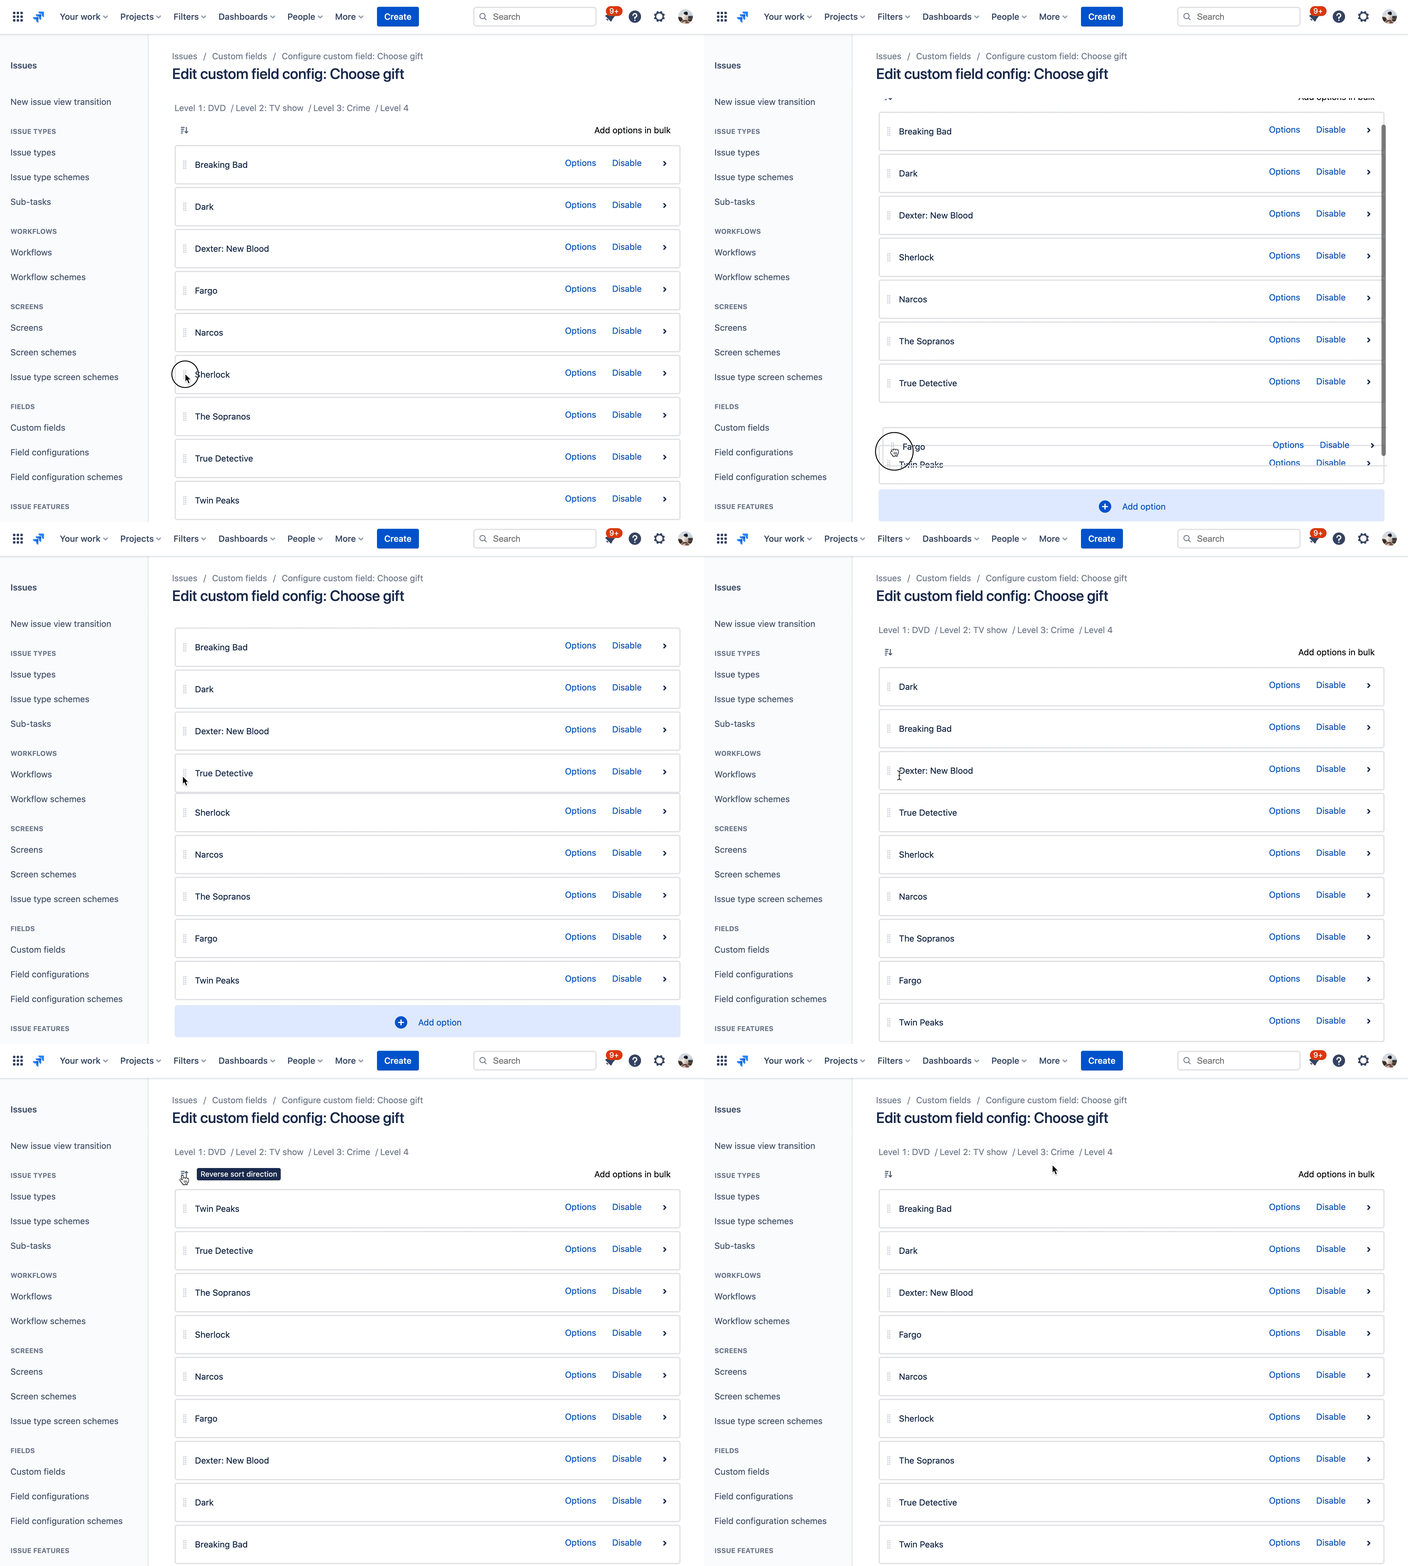
You can change the position of options within a level. Hover over the drag-and-drop icon on the left side, grab the option, and move it anywhere. You can also click on the icon above the options and sort them alphabetically. Clicking the icon again will reverse the sort order.

How to disable the option?
If you don’t need an option but don’t want to lose data already written in issues, disable it. Don’t delete it!
Steps
- Go to the option that you want to disable.
- Click Disable.
- Click Save to save changes in the custom field.
Result
The disabled option is not available in the user’s selection, and neither are its children. However, you can turn it on at any time by clicking Enable.